Auto Feature Images Features
The Post Thumbnail Generation
You can generate post thumbnails if there is at least one existing image and no other featured image defined. In this case, the plugin will grab this image and set it as a featured image.
Before the update, APT used to generate images from its own media library. Now even a third-party website image can become a featured image. Just make sure to add a link to the external image inside a page or a post.
The Automatic Post Thumbnail Generation
The automatic post thumbnail generation was a default feature in the old APT version, so, once published, each new post displayed a featured image chosen from all the post images randomly. Sometimes, it caught authors by surprise when they activated the plugin and all posts with no featured images suddenly and randomly displayed one. It could confuse the editor or even upset him if he wanted to choose custom featured images for each post.
We’ve paid attention to our users’ feedback and disabled the default post thumbnail generation feature in the new APT version.
To enable the feature go to the plugin settings: Auto Post Thumbnail => Settings

Scroll down a bit and look for Enable automatic post thumbnail generation. Now press On to activate the feature.
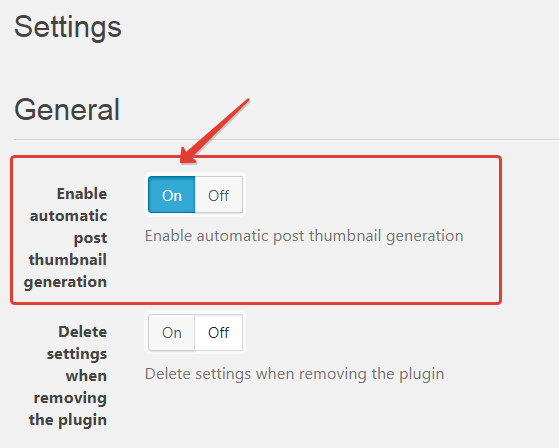
Here, you can also choose whether to save the current APT settings after removing the plugin or not. By default, the settings stay untouched. It means that the PRO license and your current preferences are safe. To activate the removal feature press On.
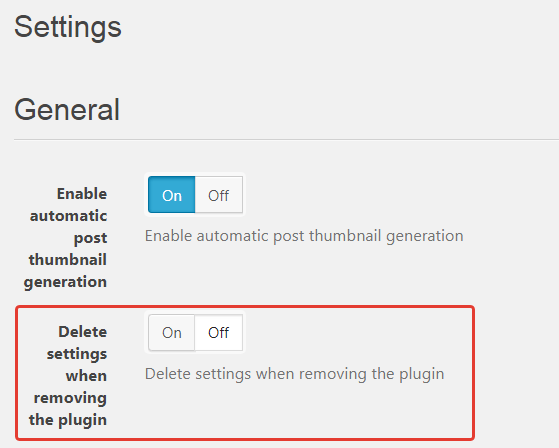
Make sure to save the changes before closing this page. Use Save settings at the bottom of the page.
Generate Post Thumbnails on a Command
You may not want to have a featured image generated automatically – and randomly – each time you press Publish. In this case, generate images via the command.
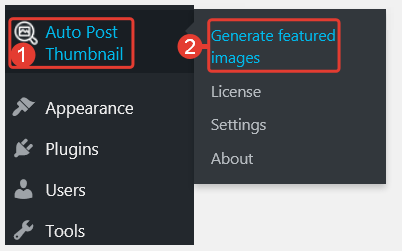
Open the plugin menu on the dashboard: Auto Post Thumbnail => Generate featured images
Use the filter below to select posts for featured images.
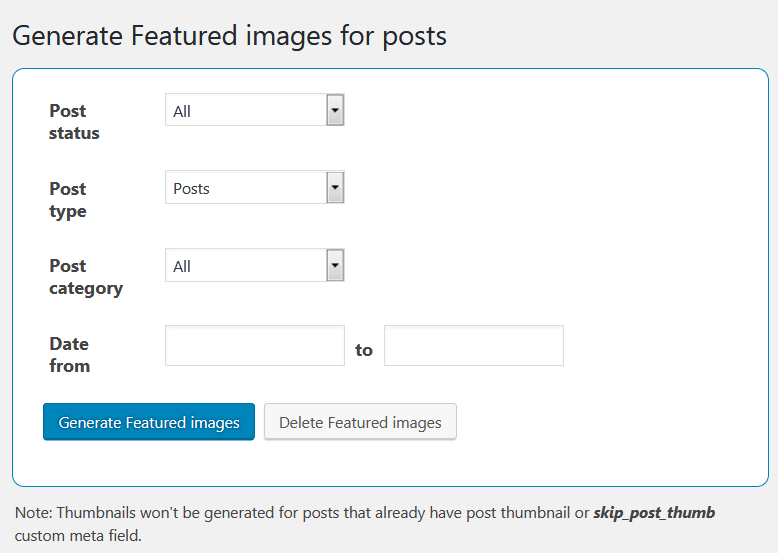
For example, it can be Post status. Click the drop-down list and choose one of the options: Published, Scheduled, Draft, Pending, Private or Trash. Choosing Publish means that only published posts will have featured images generated.
You can also set up featured images for post types: Posts or Pages.
If you want featured images to be generated for a certain category of posts, select this category from the third drop-down list (for example, Animals).
Sometimes, you need to set up featured images for posts created within a certain period. If so, just specify value range (for example, February 1, 2019).
Once you’ve finished changing the settings, press Generate featured images and check the result. The featured images displayed in the posts within certain criteria (if defined). A progress bar shows you the progress of the featured image generation.

The procedure is the same if you want to remove featured images. Using – or not using – the filter helps to remove some of the featured images or perform a bulk action. Once you define all the necessary criteria (if needed, of course), click Delete Featured images.
When the generation is completed you will see a report showing the total number of posts checked and the total number of posts with featured images added.
The Featured Image Generation – Custom and Bulk
The whole process of the featured image generation is fully manageable. A user selects certain posts to add a featured image. It may be custom posts or all posts at once.
The Featured Image Generation – Bulk Action
Open the post list, select all the necessary posts and click Bulk Actions to see a drop-down list.
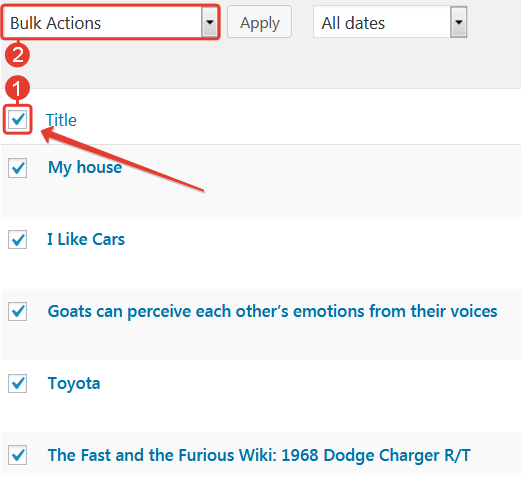
Find Generate featured image and click it.
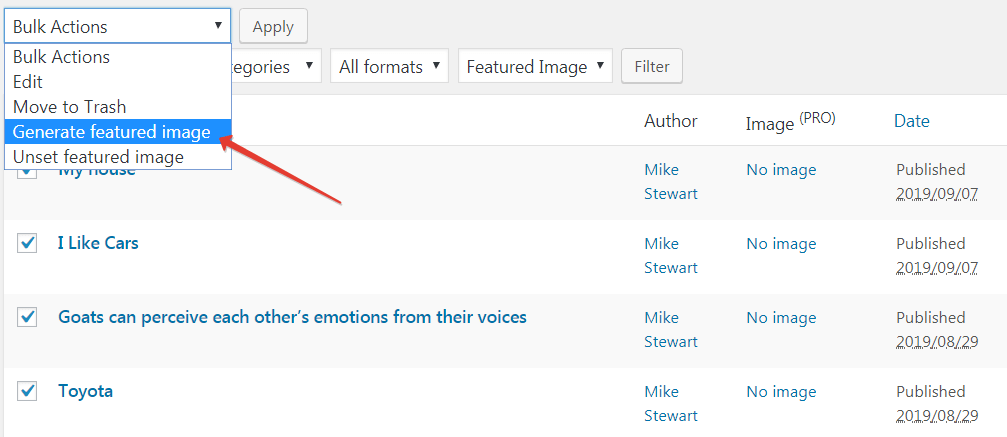
Click Apply to see the changes.
The Custom Featured Image Generation
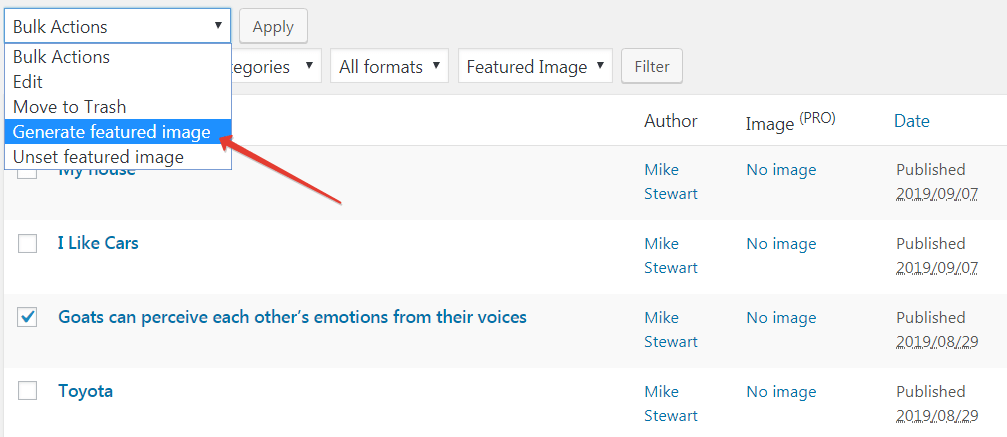
The procedure is pretty much the same, except for one difference – you need to select one or several posts. Click Generate featured image in the drop-down menu and press Apply.
The Featured Image Removal – Bulk or Custom
The Featured Images Removal – Bulk Action
Open the post list, select all the necessary posts and click Bulk Actions to see a drop-down list. The procedure of removing featured images is similar to the featured image generation in bulk.
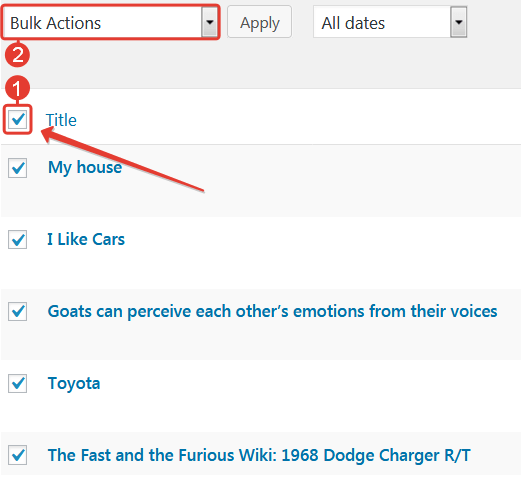
Find Unset featured image in the drop-down list and click it
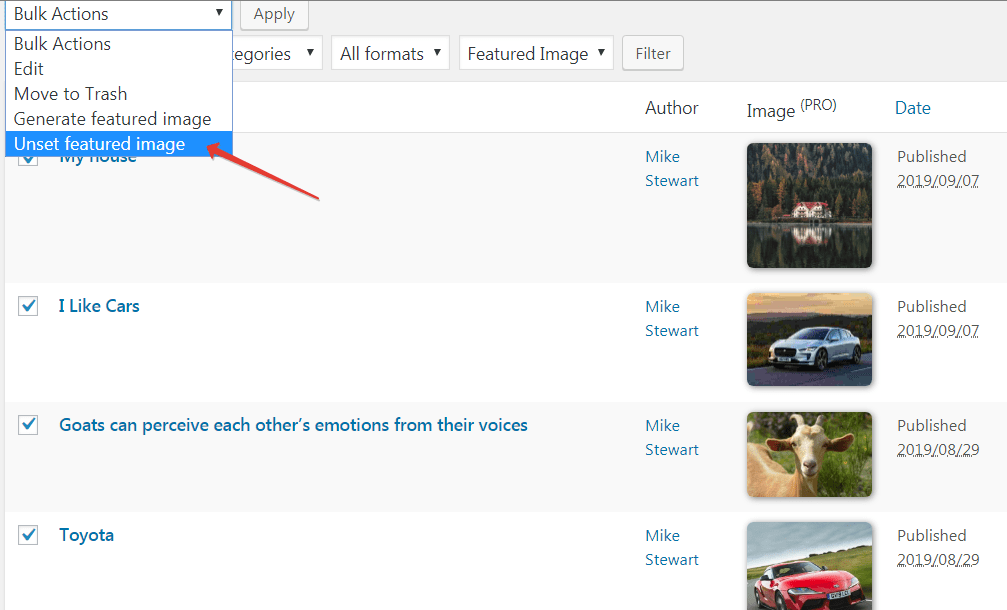
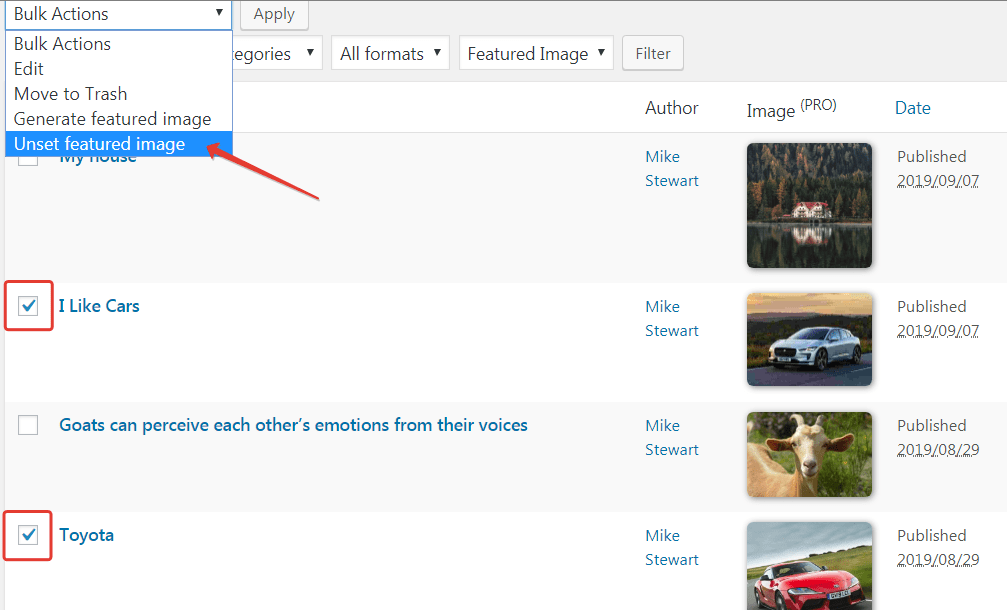
Custom Removal of Featured Images
The procedure is the same as in bulk removal. Select the posts to remove featured images.
Choosing the Featured Image from the Post Images
available in the premium version only. Buy the PRO version.
First of all, check the Image (PRO) column at the post list. Here you see all featured images without opening a post editor.
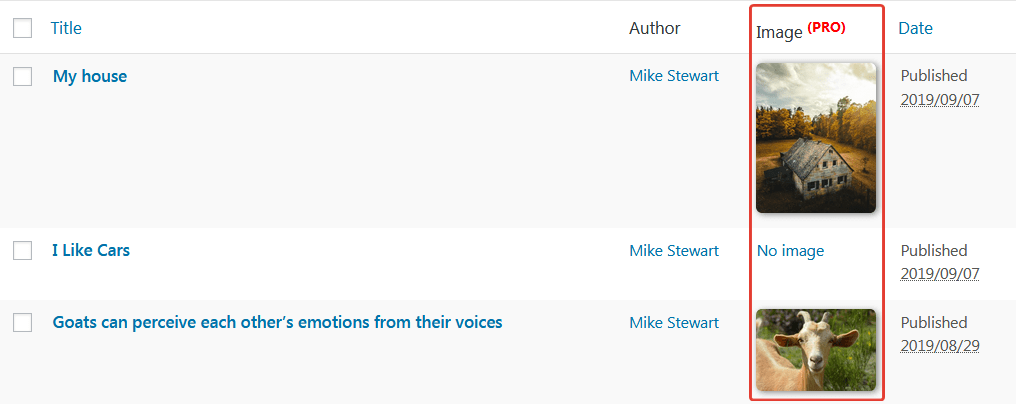
Set Up the Post Thumbnail
In case the featured image is missing, you can set it up right from the post list. Just click No image.
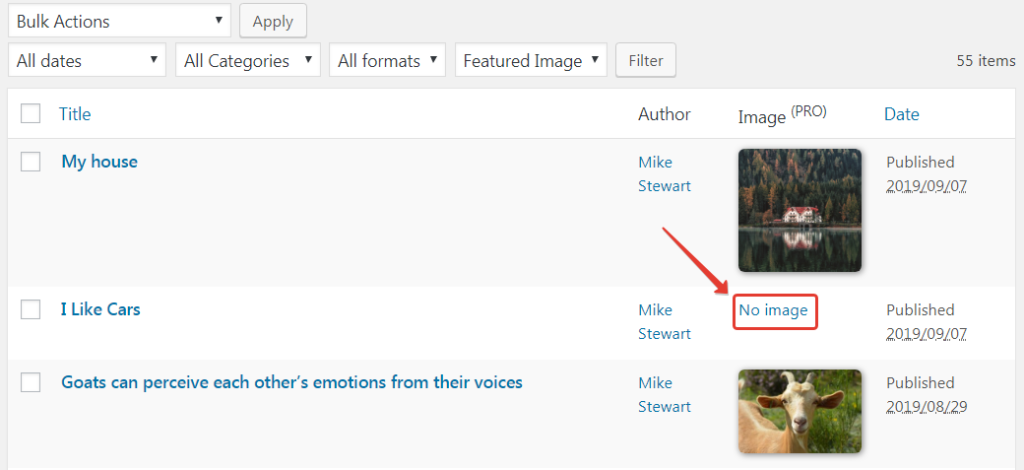
You will see all post images in a new window. Select one of the images and click Use as featured image.
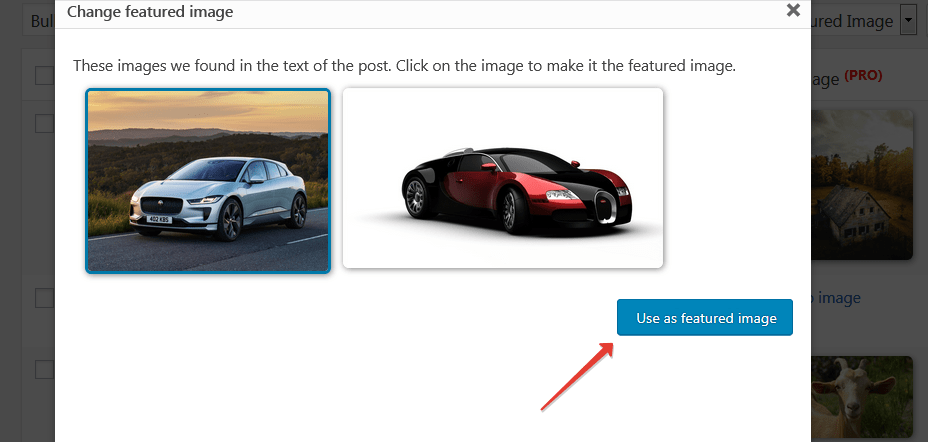
A featured image is defined.

Changing a Featured Image
To change the existing featured image, follow the steps below: open the list of posts and click the featured image you’d like to replace.
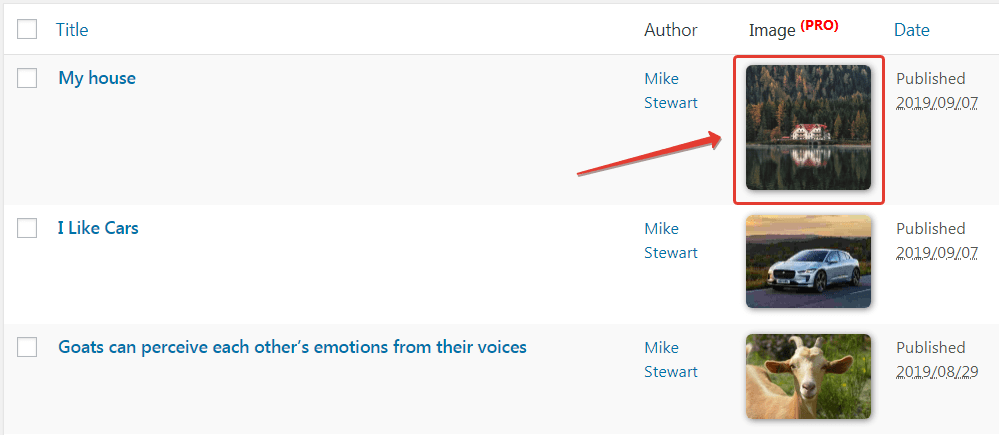
You will see all existing images for this post. Select one of the images and click Use as featured image.
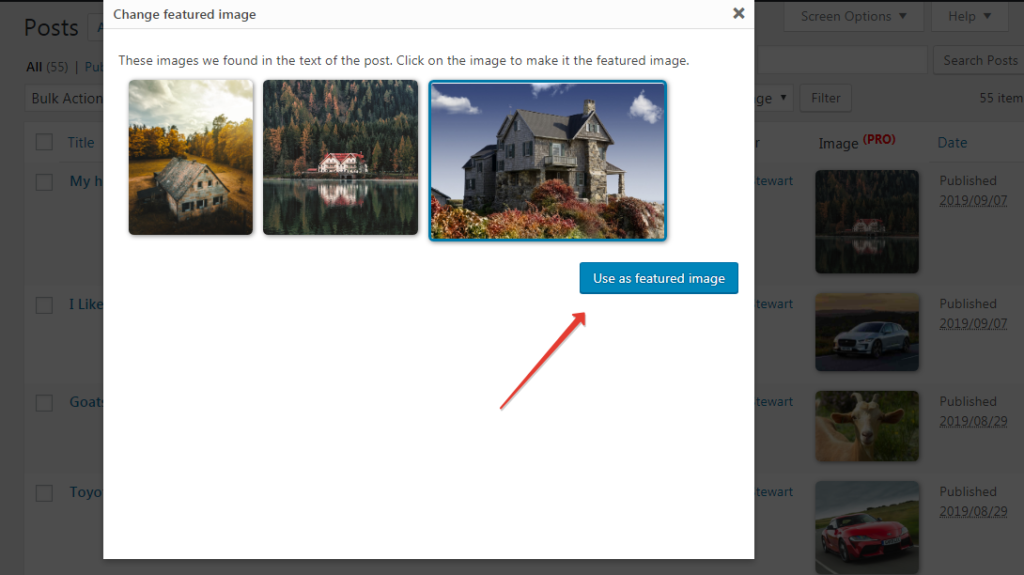
You’ve successfully replaced the featured image of the post.

Search for Images with the Creative Commons License
The latest Auto Post Thumbnails version has a brand new feature helping you to search for new images right from your website’s dashboard. There are three websites with images available: Google, Pixabay, and Unsplash. Keep in mind that images at Pixabay and Unsplash are distributed under the public Creative Commons license, which means you can use the images in your projects – the authors don’t mind.
How to Set Up the Feature
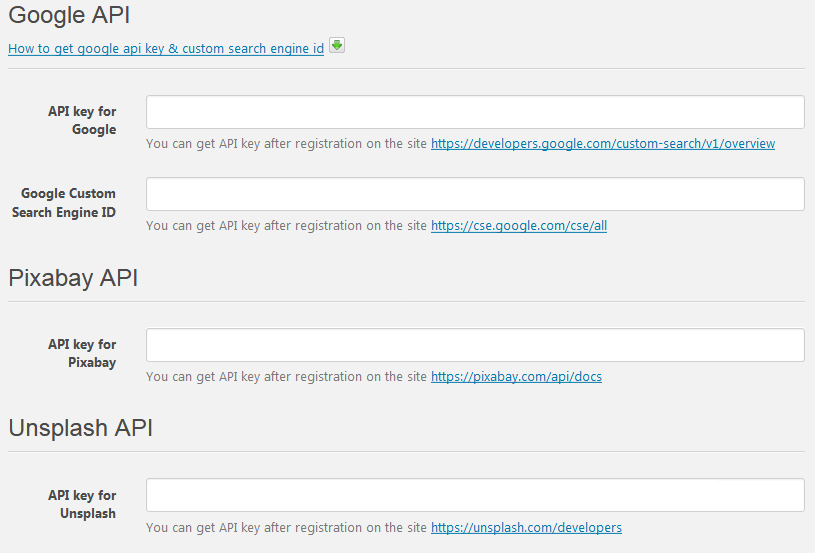
Before you start working with a photo stock, you need to configure its API in the plugin settings. Open Dashboard => Auto Post Thumbnail => Settings
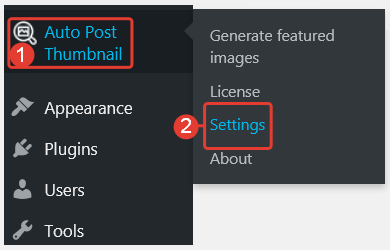
Scroll down to the input fields for the API keys and follow the links provided to find & copy API keys.
You need to sign in to these websites to see API keys. Exception: Google if you’ve already had an existing account. More about Google APIs read here.
How to Add an Image to the Website using APT
You can add photo stock images to the website through the media library or post & page editors.
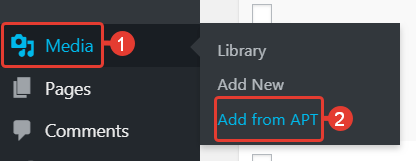
Through the media library: Open Media => Add from APT
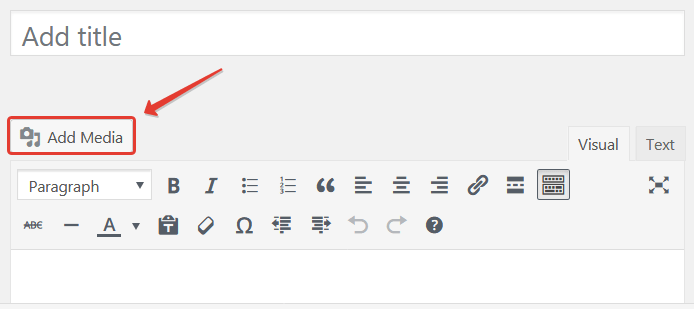
From the post editor: Posts => Add New, click Add Media
The following steps are practically the same for both methods.
Here you see a page for the image search. The first tab shows the Google search bar. All you need to do is to add a search request and press Enter. However, the Google search offers you 10 search requests per hour only.

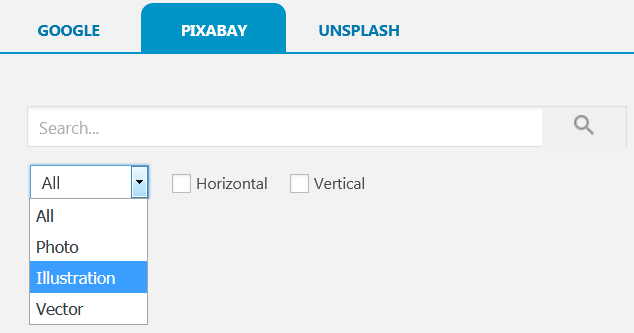
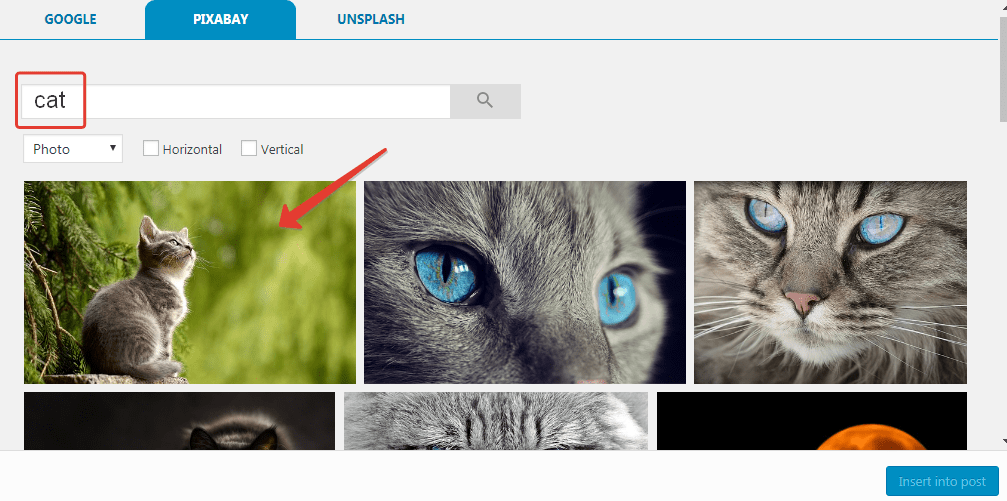
The next tab, Pixabay, has a filer to specify the image types: Photo, Illustration, or Vector. You can also define whether you’d like to see horizontal or vertical images.
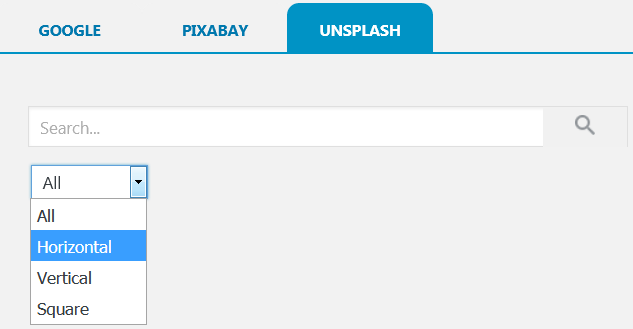
Unsplash has filters on the image form & configuration: Horizontal, Vertical, Square.
Let’s see how it works on Pixabay. Enter a search request “cat”, filter Photo only, and press Search. Select the necessary item and click the image to add it to the media library.
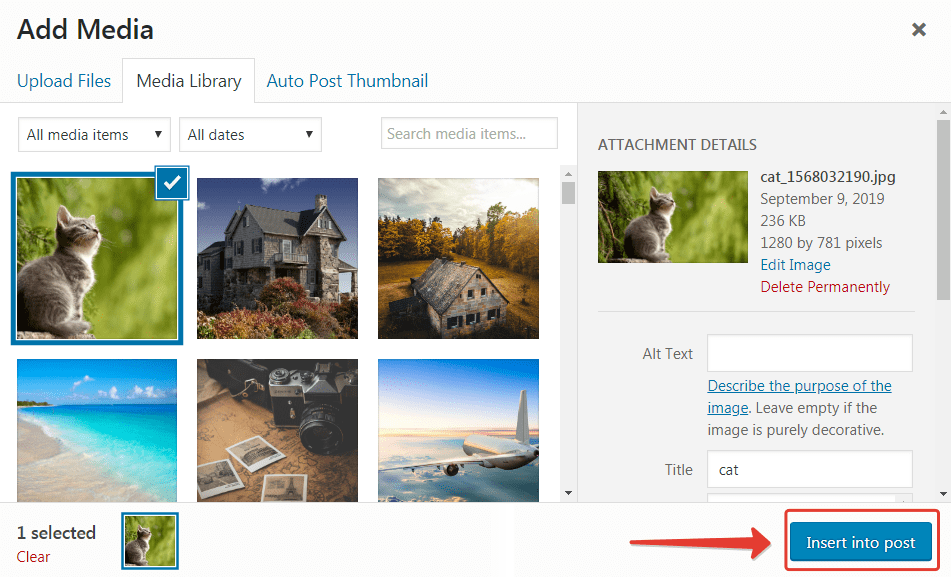
The image added to the media library. Click Insert into post to see the image in the post.
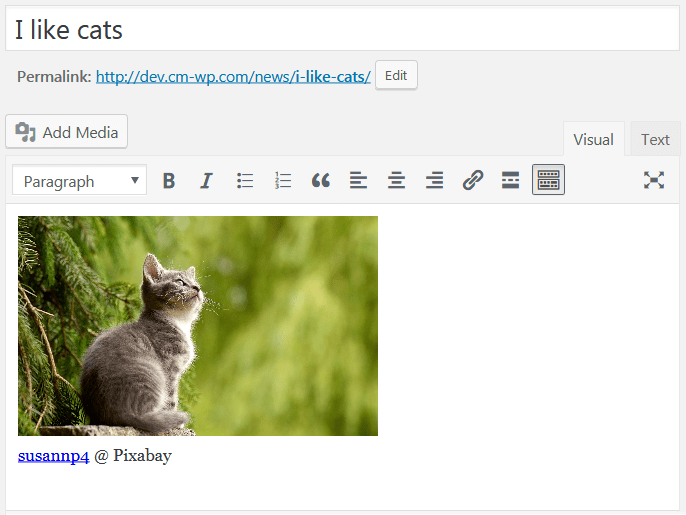
The image added.
You can go back to the search results multiple times.
How to Add Images on the Website using Elementor and Gutenberg
Gutenberg
To add an image to the website, open a post/page in the Gutenberg editor. Create a new block by clicking Add block. A pop-up window with all the blocks available shows up. Select Image and click the corresponding icon.
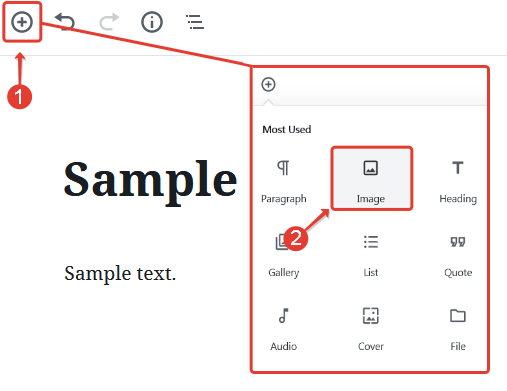
The next window offers you to choose the image location. So click Media Library, and choose Auto Post Thumbnail inside the Select or Upload option. Now you’ll see a classic interface with a search bar and three search engines available.
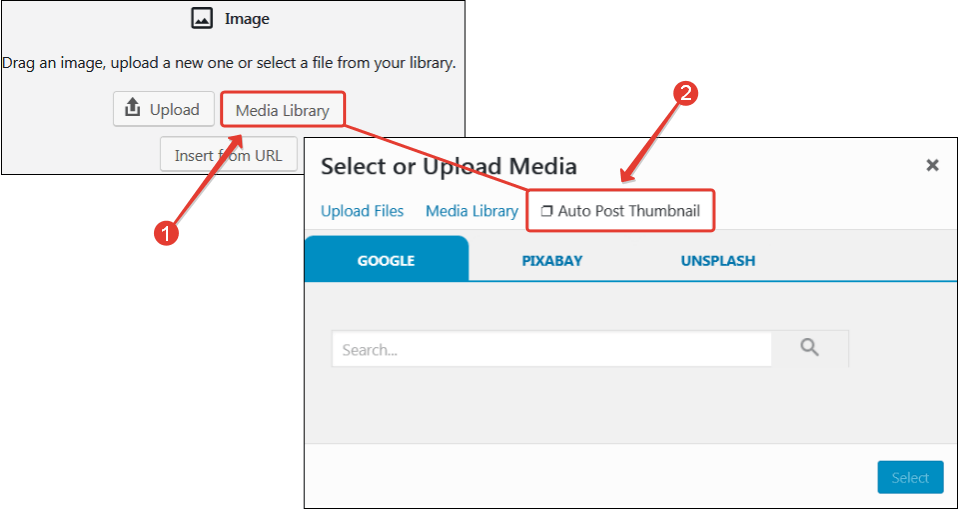
Search for the image and add it to the post/page using the regular method. For more details see above.
Elementor
To add an image to the website, open a post/page in Elementor. Click the Image icon and drag & drop it to the Drag widget here area.
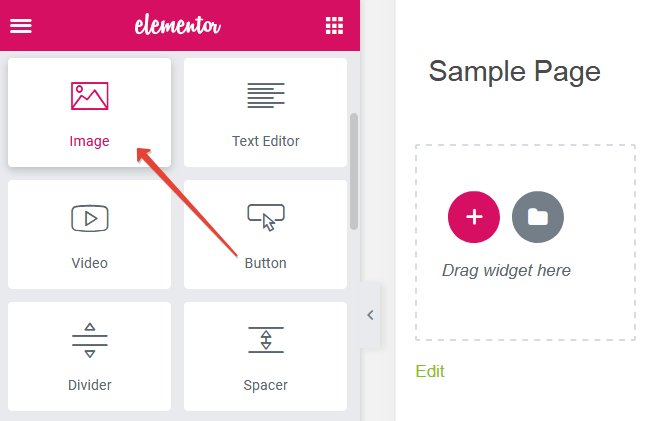
Now the blank block shows a slot for the image. To add an image, click Choose Image.
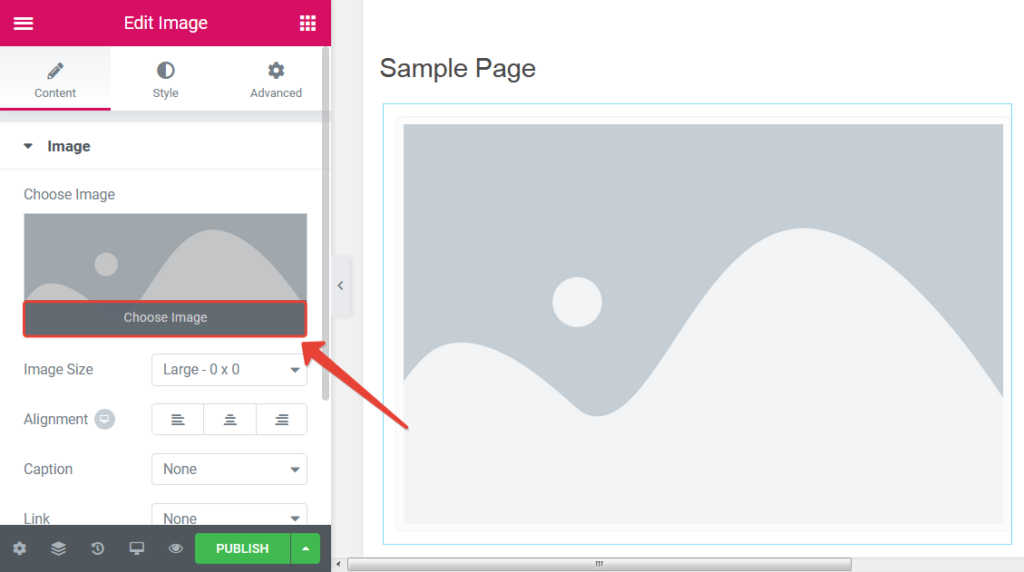
Once you click Choose Image, you will see a new window – Insert Media. Go to the Auto Post Thumbnail tab to see a classic search bar for Google, Pixabay, and Unsplash.
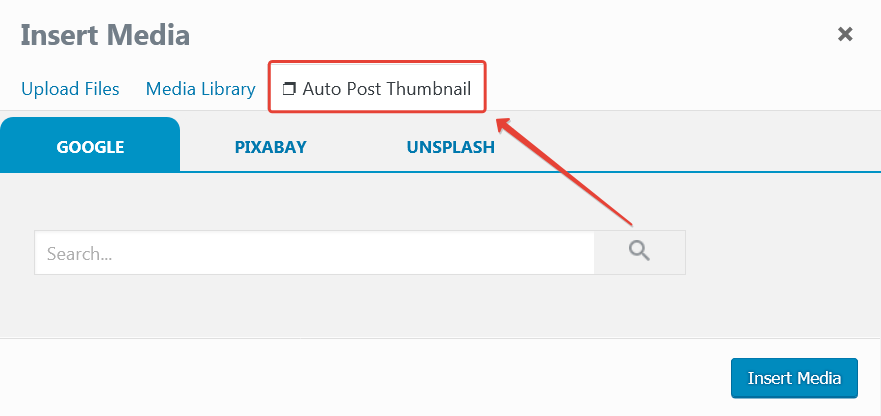
Type a search request and add an image. This procedure is the same in all editors.
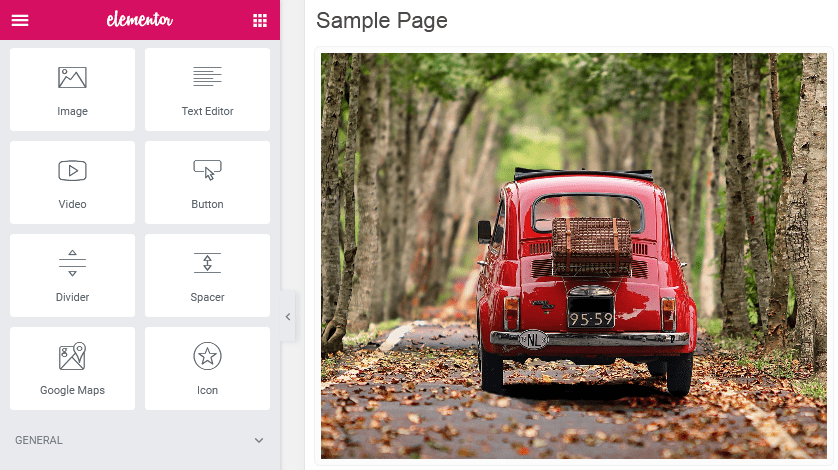
To add Image Box, drag & drop the icon to the existing block…
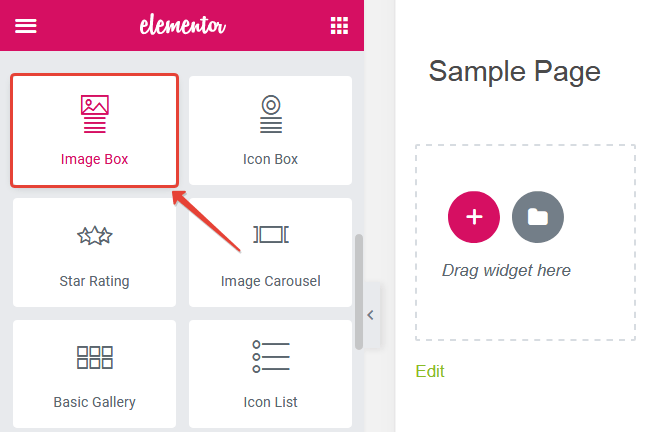
… and click Choose Image.
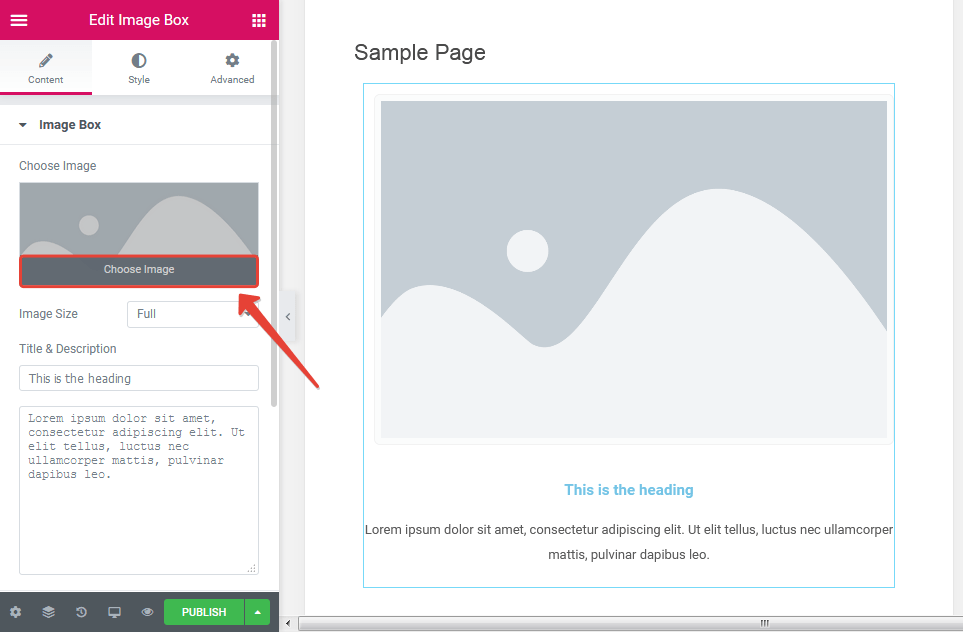
Add the image (repeat the procedure for Image, see above).
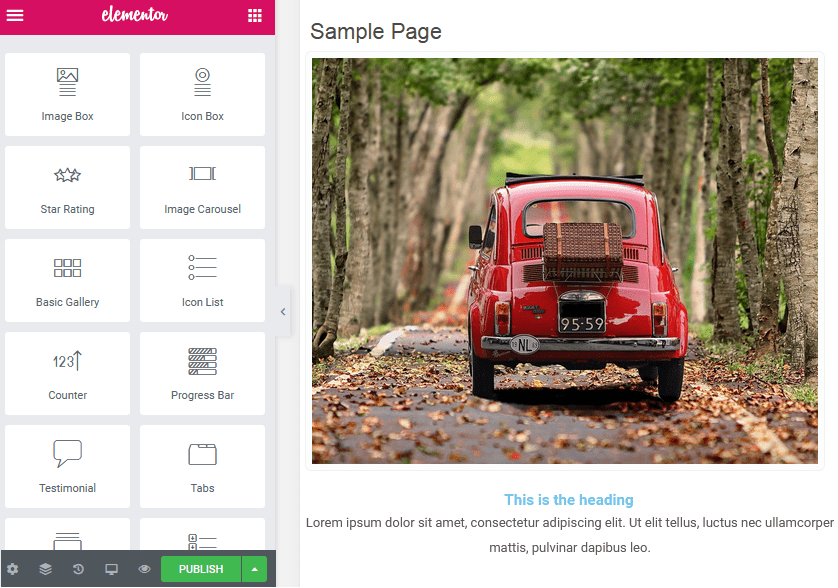
Edit text and publish a post.
We pride ourselves on creating happy customers
We’re all about two things here at APT; building top quality products that you’ll love to use, and looking after our customers. If you’re not happy, we’re not happy. It’s the reason we’re proud to offer a 14 day 100% money back guarantee on all of our products.


Clearfy WordPress Optimization
Social Slider Widget
Support
Individual entrepreneur EKATERINA VLASOVA. Georgia, Tbilisi, Samgori district, police lane N5, floor 2, N4a